
Recordings & Scanpaths
#Eye-tracking Recordings allow you to analyze and download visualizations of participants' gaze and fixation paths and track their mouse cursor movements.
#What Are The Recordings?
The Eye-Tracking Recordings are videos that show how participants’ eyes moved over items during the test. A moving orange circle represents the gaze point, indicating where the participant was looking at a specific moment throughout the test. The yellow lines trace the fixation path (you can also enable the gaze path in the Recording view options - see below for more details).

This allows you to analyze how the participant perceived your item: where they looked first, where they looked last, and the movements of their cursor, including where they clicked.
The Recordings also display the items in the order they were presented, which is especially useful if the "random order" option is enabled.
See a sample recording here.

#Where Can I Find The Recordings & Scanpaths?
There are two ways to access the Eye-tracking Recording of a specific participant:
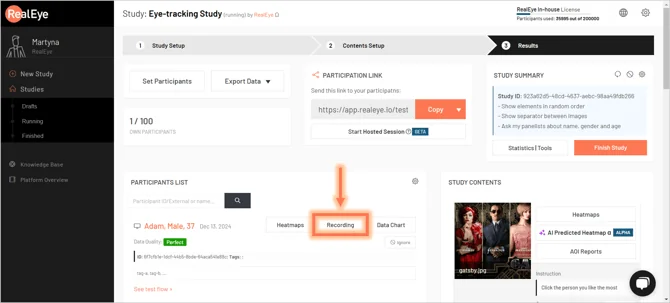
- In your study, navigate to Results (ensure you have an active License). Then, in the Participant List, select the participant whose Recording you want to view.
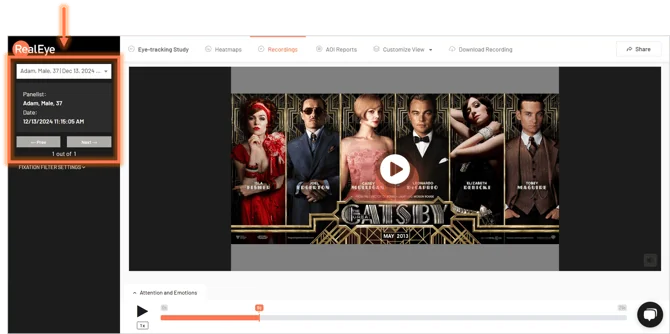
- In the Analytics Dashboard, go to the Recordings tab. In the left panel, select the participant whose Recording you want to view.
#Custom Recording View Options
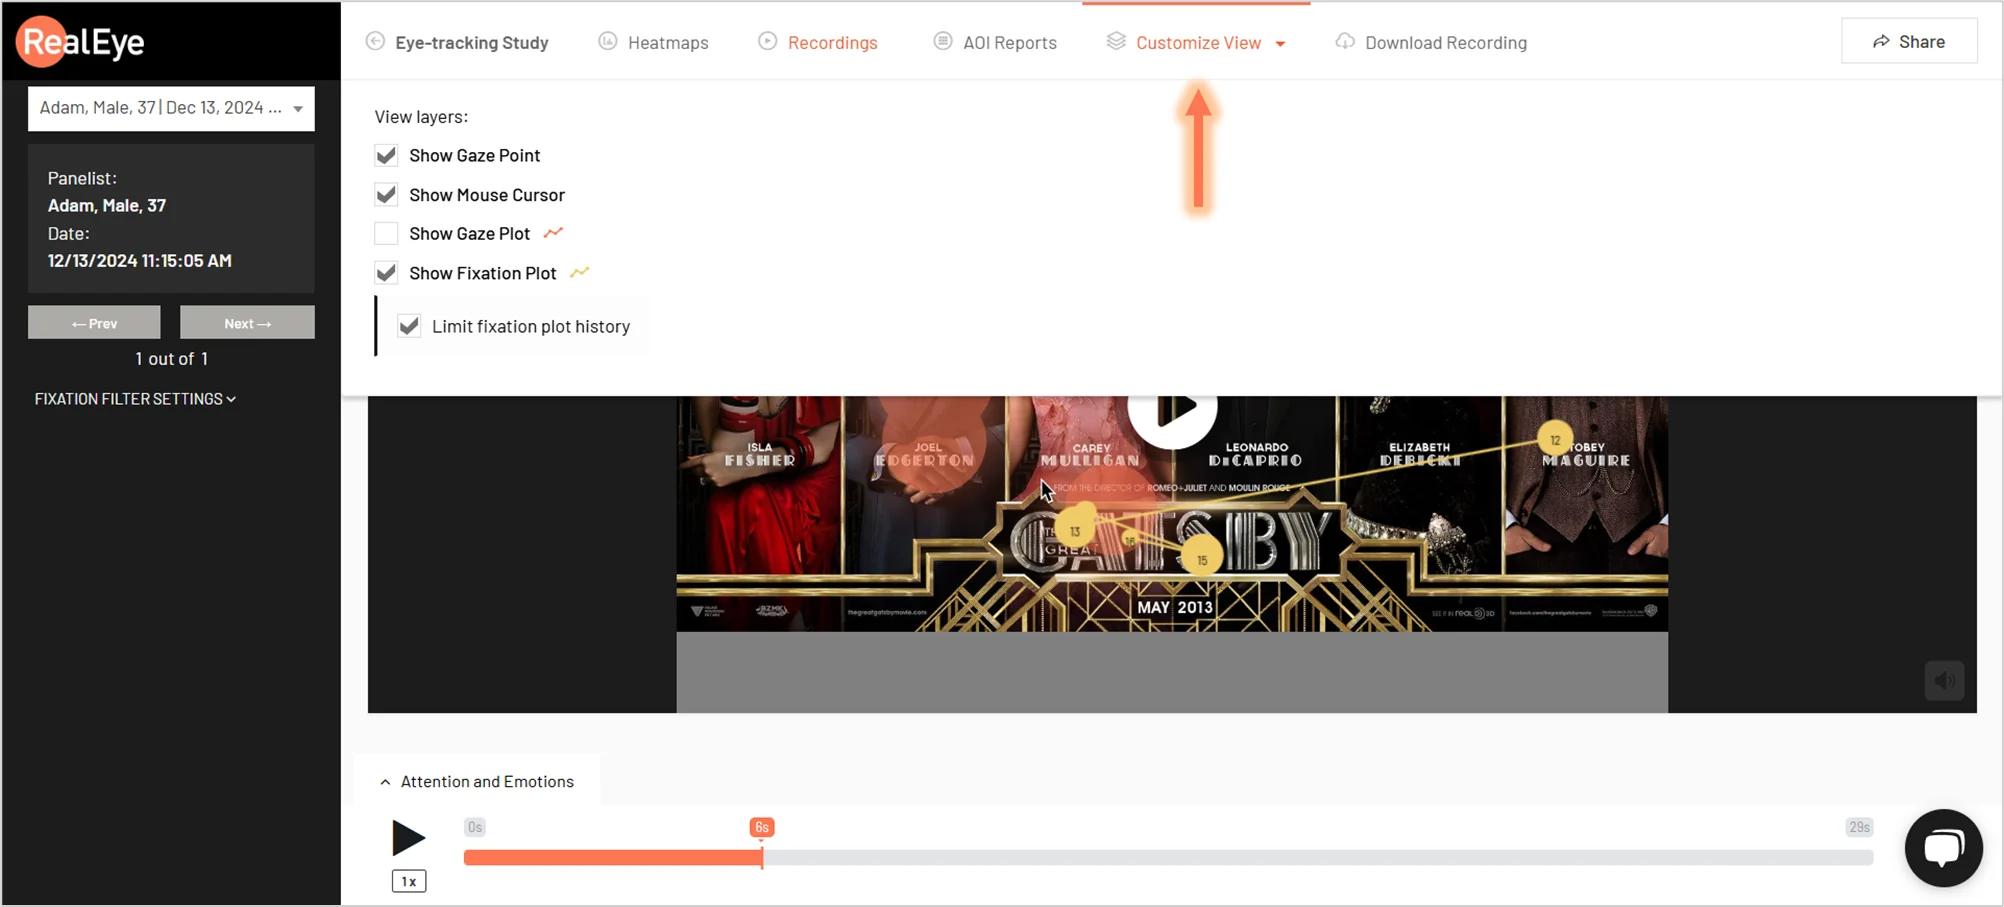
While watching a participant's Recording, you can adjust several display options in the Customize View dropdown menu:
- Show/Hide the Gaze Ghost (on by default for Screen Recording and Mockup studies).
- Show/Hide the Heatmap (on by default for image and video studies).
- Show/Hide the Gaze Point (the Gaze Ghost and the Gaze Point are mutually exclusive).
- Show/Hide the Mouse Cursor.
- Show/Hide the Gaze Plot (off by default).
- Show/Hide the Fixation Plot.
For the gaze and fixation plots, you can limit the history to display only the last 3 seconds.
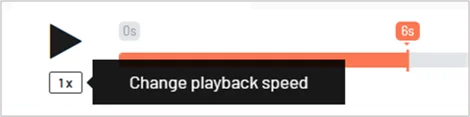
Additionally, you can adjust the playback speed. Below the play/pause button, there is a control that shows the current speed (1x, 0.5x, or 0.25x). Simply click this button to change the playback speed.
#How To Download The Recording?
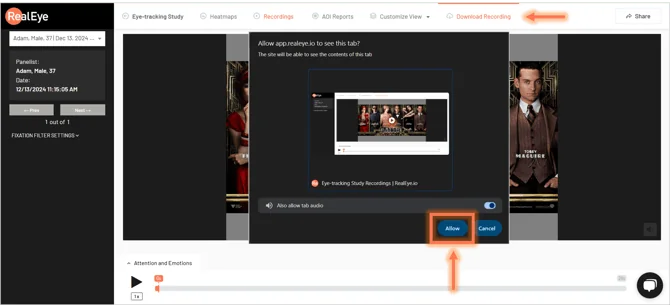
To download the Eye-tracking Recording, click on the Download Recording tab in the menu at the top of the screen. In the pop-up window, allow the screen recording to proceed. During the download, do not stop screen sharing or change the tab/screen size. The video will be saved in WebM format.
#Annotations & AI-suggested highlights (Screen Recording studies)
For Screen Recording studies you can add timeline annotations to a participant's recording:
- While the recording is paused, an Add annotation tooltip appears above the current-time indicator on the playback timeline; click it to create an annotation at the current playback time. Optionally pick a kind — INFO, BUG, or NOTE (or none) — and add a comment.
- Annotations are shown as colored bars on the playback timeline (looking like differently colored parts of the timeline): the bar color matches the kind (INFO = blue, BUG = red, NOTE = amber, none = grey). Hovering a bar shows its kind, time, author, and comment; clicking it opens a details popup where you can Play (jump the playback there), or Edit/Delete annotations you created.
- When the recording contains voice-over audio, its transcription is processed by an external AI provider and the analyzer suggests highlight moments (time + suggested kind + short comment) based on the transcription. Suggestions appear as kind-colored markers on the timeline (like regular annotations): Accept converts one into a regular annotation (owned by you), Dismiss removes it.
- The Annotations box in the sidebar shows a scrollable preview list of the same annotations (time, kind, short comment); clicking an item starts playback at that moment. While automatic annotating is in progress, the box shows a progress indicator instead.
- Annotations and suggestions are visible to everyone who can view the recording and do not affect the gaze point, fixation/gaze plot, mouse cursor, playback speed, download, or sharing of the recording.
💌 If you have any questions or need further assistance, feel free to reach out to our team at contact@realeye.io